Overview
Karrix is the final status 4 boss, who guards the entrance to the Ancient Orc Tomb.
Karrix is the final status 4 boss, who guards the entrance to the Ancient Orc Tomb.

The Karrix battle is separated into 2 phases, a DPS Phase and a Burrow Phase, each containing abilities that do fatal damage if a player does not know how to mitigate them.
The following are the significant sections of the boss area:

This is the only phase where the boss can take damage from players and lasts until the boss loses 1/3rd of his total HP. When the boss reaches 66% and 33%, he will burrow and become invulnerable for a Burrow Phase.
Karrix has cleave, which causes him to deal damage in a huge area in front of him with his basic attacks.

Tail Lash
Karrix lashes his tail, spawning a sand void zone by behind him that deals damage per second. Players should avoid positioning behind the boss throughout this phase.

Poison Lob
Dialog: Suffer, playername
Karrix targets a hero that is 300+ range away from him then tosses a slow moving projectile at the location of the named player, which does instant damage upon landing, and spawns poison void zone with large AOE, that continues to do damage per second for a significant amount of time.
On VX mode, Mini Scorpions will also spawn during this phase (instead of only on Burrow phases) and killing these during this phase will trigger the boss to cast Tail Swipe.
Karrix burrows and becomes invulnerable throughout this phase. This phase lasts until after his 4th cast of Spikes of Malice, prompted by the dialog: *krrssshhhh* arg, ENOUGH!
Mini Scorpions will continuously spawn through this phase.

Karrix Spike Wall
A wall of spikes will travel along the Outer Layer (3) of the zone, dealing fatal damage to any heroes in its path. Heroes will need to remain in the Inner Layer (2) to avoid it.
Spikes of Malice
Dialog: *krrssshhhh* I come for you, playername
Spikes will appear from a random side on the outer layer (3) and slowly accelerate to the named player. Spikes of Malice causes instant-death to the named player and fatal damage to any other players it touches. If the named player dies, a new player is named and pursued. This ability continues until the spikes collide into a pillar (4).
Every time Karrix collides with a pillar during Spiked of Malice, a permanent sandfall zone appears at a random location in the area that deals damage to players that it comes in contact with.

Healer baiting the Poison Lob.
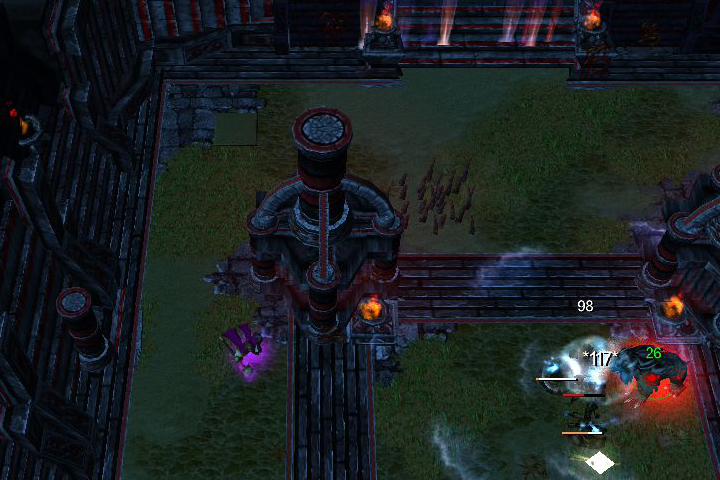
This is his main ability during phase 1 that the heroes need to be deal with. Simply assign 1 hero to act as a bait, maintaining a large distance from the boss so that the other heroes can safely deal damage to him. If the boss is tanked in the center, the poison baiting hero can wait at any corner in the outer layer (3) until a poison lob is thrown to then move to a safe spot. A boss will continue to cast this ability in regular intervals (approx. every 10s) until he loses 1/3rd of his total HP.
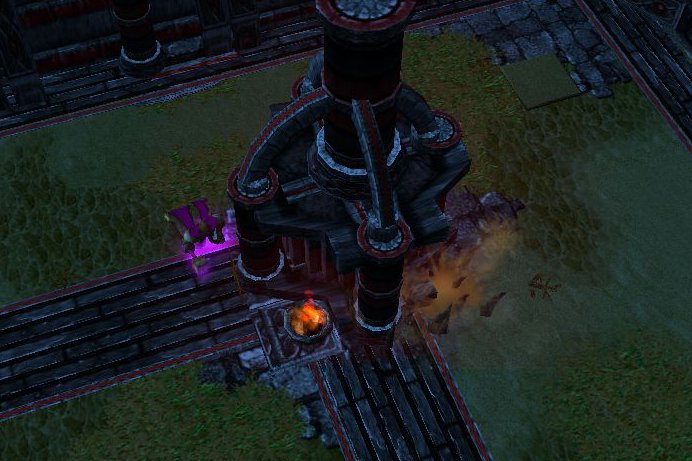
Karrix collides with pillar.
While all heroes should be in the center during this phase, the one named by this ability needs to quickly position himself by a pillar (4) so that it is between the hero and the boss. When the boss collides with a pillar (4), the hero needs to quickly re-position in the inner layer (2) to avoid the Wall of Spikes ability in the outer layer (3) again.
When transitioning from a DPS to Burrow phase, make sure to position in the middle layer as fast as possible, especially the hero baiting the poison lob who may not see the transition occur.
When returning from a Burrow to DPS phase (indicated by a dialog after his 4th main ability cast), a hero should position at a distance from the boss to bait the poison lobs again.
Condition: Defeat Karrix after you kill all 5 baby scorpions causing him to enrage.
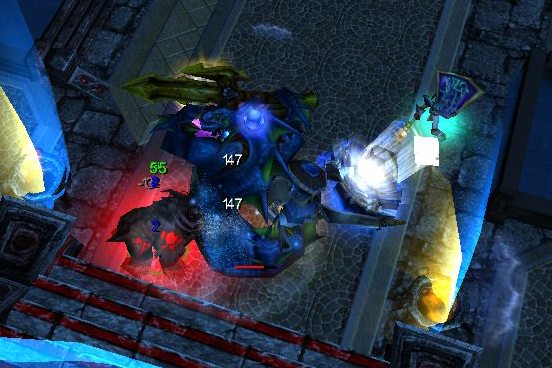
Upon entering the boss area, ignore Karrix and proceed to kill the 5 baby scorpions that roam the Outer Layer (3), typically on the north half. The boss can be auto-attacked (e.g. so that tank can get aggro), but dealing too much damage to him will cause the baby scorpions to burrow, not triggering VX.

Karrix VX - Eliminating the 5 baby-scorpions.
The following changes apply during VX mode:
Condition; Kill 5 minis, then allow Karrix to create 5 sand zones to spawn in the 1st, 3rd, and final phase. Don't overlap the sand zones summoned by Karrix via his tail during poison phases. Sand zones must have at least a 500 range distance between each one to trigger UVX (this also must be done in the 1st, 3rd, and final phases). When karrix burrows at 1st phase, if everything executed correctly he will say. You can't do thisss! You're not ssstrong enough!. The same text have to appear in 3rd phase as well.
Things You Should Know Before Starting
General idea about how to kite for Tank & Runner & DPS
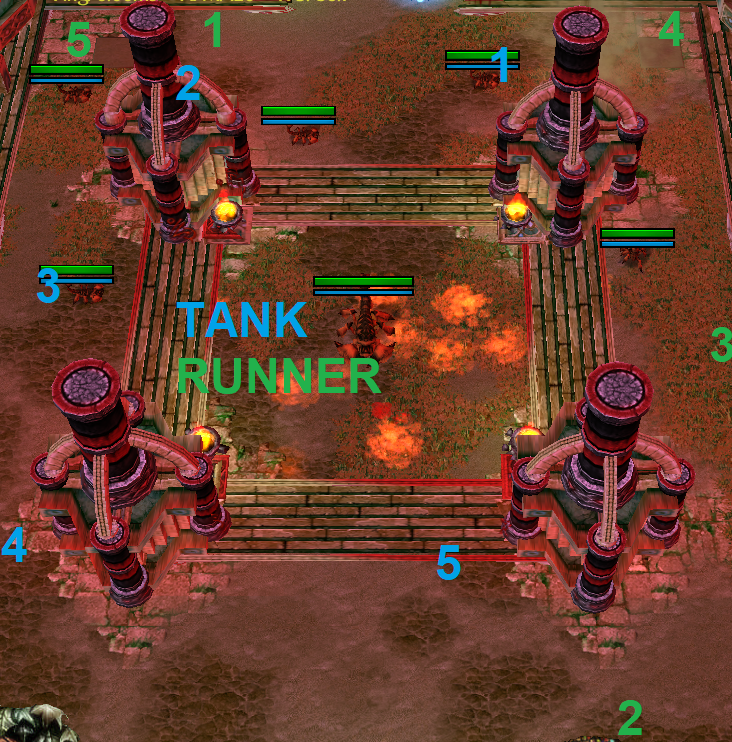
Runner: Get spikes stay stall few seconds at 1st spot later go to 2nd and wait for first poison. Go to 3rd area to place second poison while running towards 4th spot. In here place third poison again run towards to 5th spot. After fourth poison throwed exit the arena by going first right > middle to exit area. Going strait towards below from corner too much risky, when spikes changes there is high possibility spikes hits the pillar.
Tank: Taunt and go to 1st spot stand there after first sand & poison go to 2nd spot. After boss place 2nd sand either wait for poison "after poison pull the boss towards 3rd spot asap, because boss place 3rd sand more faster so it might place it close to 2nd sand" OR instantly go to 3rd spot "this requires high move speed, and don't slow the boss" if you fuck up you or near teammates will be targeted by poison. After placing 3rd sand at 3rd spot instantly go to 4th spot "be sure to not pull the boss too much from your team on that spot". At 4th sand he throws poison first and later places sand, now go to 5th spot OR pull closer to exit "players staying outside can faster burst and get out asap".
DPS
Be sure to not pull boss too much from your team, they have to stand on stone pavement or they can even stand above exactly 1 square away "this is important at 3rd phase where Spike of Walls cannot hurt them".
Runner enter arena first and rush towards the top to safely kite spike (spike does 600 damage). Spike spawns at different spots each time at top areas.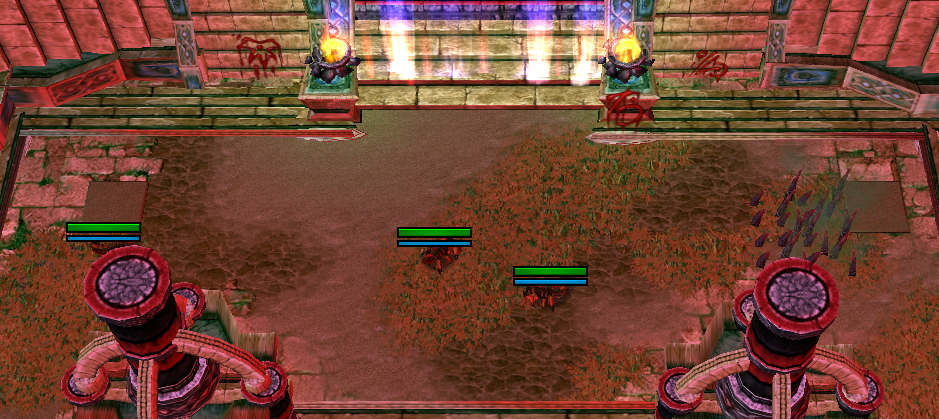
After securing spike runner goes to the bottom right area to place the first poison, try to place the poison far from exit. Poison has to be placed at outer areas only. DPS should kill 5 minis while tank instantly taunts and takes his position at the first spot. Always keep the boss position diagonally so your teammates don't get cleaved. Rotate to the next spot after each poison case.
For healers there is no extra thing you should do except doing their usual job. Damage dealers should kill mini scorpions; they also can DPS the boss beforehand to make smooth phase changes (after 5th sand zone created) if DPS lower than you expected. At final spot "picture below" after boss spawn 5th sand burst him to change the phase each time. You have to do this at 3rd phase too.
After boss burrows spikes will change the target. The Spikes of Malice begin to follow "player name". Spikes also change target when karrix comes back to the arena. Those spikes follows the player faster each these phases 3rd & 5th.
PS: After karrix burrows all players except TANK must have leave the arena to let spike follow the tank.
Each time before karrix comes back, tank can lure the spikes to top left area to give the runner better control on spike & timing.
During Phase 3 & 5 "Wall of Spikes" will be spawn at outer side of arena and begins to move slowly around it, when you get hit by it does 130 damage each spike will hurt you multiple times. (Survivable for a tank) also damage depends on magic resistance.
During Phase 2 & 4, spikes create shockwaves around them while chasing player, each shockwave hurts and has very big AoE.
Try to kill minis before they reach middle OR kill them at same spots inside the middle to prevent spreading the sand zones in order to give your team better safe spots.
After or before 4th spike "situational" all players except Tank & runner has to leave the arena, so spike will switch back to the runner.
Tank can go outer area to kite spike away from your team to give them better safe areas to move around. Until called players spike hit into the pillar.
Warning: Always check the arena for outer spikes before entering back. Before leaving the arena also NEVER rush you can always switch the spikes after you sure it is safe to leave (outer spikes).
Only during P4, I come for you, "player name". +10 mini scorpions will spawn via spike and many more will be keep spawning until you get rid of the spike.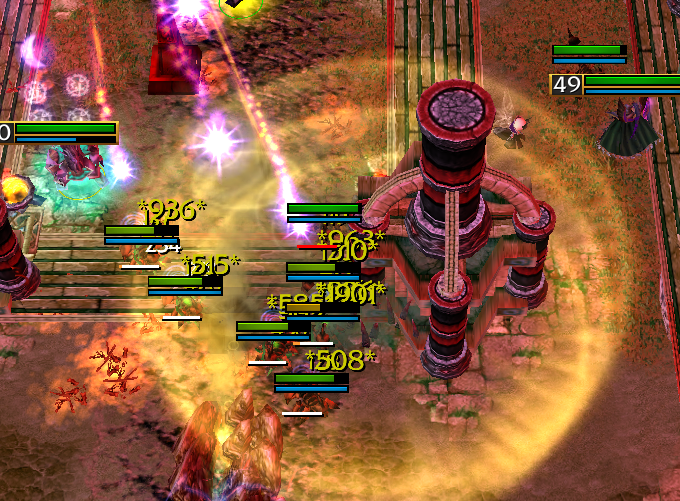
During final phase all players will constantly impaled for every 2 seconds (this can't be avoided without "Sober Guard"; it does120 damage and stuns you for 1 second).
After Karrix Dies
The room will become sealed and start to collapse. Two pressure plates will be spawn at both top corners 2 player have to stand on them same time to remove the barrier blocks the stairs. Stay at stairs and don't pass the RED line until you see text message "ıts over" later feel free to loot the items. Once you enter Ancient Orc Tomb you cannot enter back.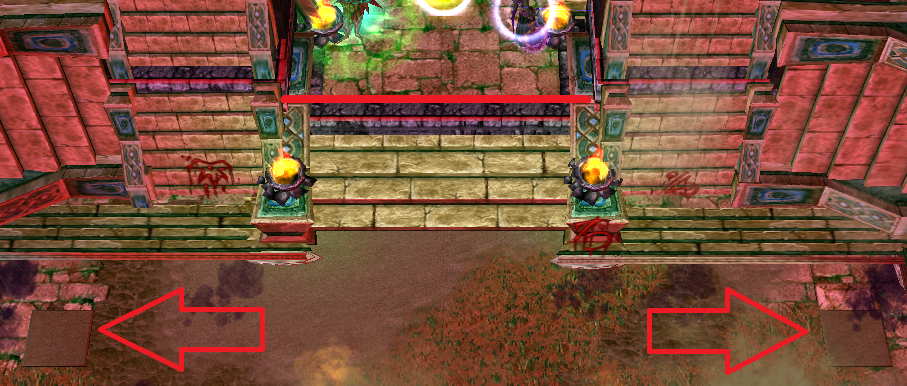
Add a Comment